
If you're wondering how to stop your photos on a Mac, from stopping your memory overflowing, you're in for a treat. Saving photos on a Mac can be as delightful as a spontaneous dance-off in the kitchen! Imagine your computer as a vast, magical library where every memory is a book filled with vibrant pictures, just waiting to be neatly arranged on the shelves. Let's dive into the simple steps to transform your Mac into the ultimate photo haven, and learn how Photobucket, the seasoned photo-organizing wizard, can boost your photo-keeping game!
Step 1: Gather All Your Snapshots 📷🌐
Start by rounding up all your photos scattered across various devices and corners of the internet. Think of it as herding cats 🐱, but way more fun. Once you’ve got them all in one place, it’s time to move to the next exciting phase! This is where it's important to try and delete the ones you don't need... if you're on an iPhone, remember you can view your different picture types and delete the ones you don't need - we're specifically looking at the screenshots section...
Step 2: Time to Import 🚀
Connect your camera or phone to your Mac, and let the Photos app swing into action. It's like opening a portal to your own personal photo universe. Click 'Import' and watch as your images parade into your Mac, ready for the next adventure. This step isn't quite as easy if you're an android users, but we've got a solution for that further down the page. Remember: if you're using your phone you might get asked to enter your passcode, which you should do. If you're just moving across a few, Airdrop is another great way you can do it if you've got an iPhone.
Step 3: Create Albums Like a Boss 📚🏷
Now, let’s get organizing! Create albums for different events, themes, or however you fancy. Drag and drop your photos into these albums, just like sorting your favorite vinyl records into genres. Rock, Pop, or those moody Indie vibes – your Mac doesn’t judge your taste!
Step 4: Editing and Jazzing Up 🎨✨
Your Mac comes with some nifty editing tools. Crop, adjust colors, or slap on a filter to make those sunset photos pop. It’s like having a photo spa day, and every picture gets the VIP treatment!
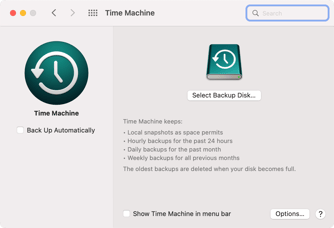
Step 5: Back It Up, Buttercup ☁️🔒
Now that your photos look dashing, it's time to back them up. Use Time Machine or Photobucket to keep your snapshots safe. It's like tucking them in at night with a warm, cozy blanket.
Step 6: Share the Love 💌💻
Sharing is caring, right? Use the Photos app to send your masterpieces to friends and family or post them to your favorite social media platforms. Get ready for the 'oohs' and 'ahhs'!

🎩 How Photobucket Can Be Your Photo Fairy Godparent
![]()
Now, if you've ever received that dreaded "Mac storage full" message, don't panic! Here's where Photobucket enters the scene with a sprinkle of organizational magic. It's an online cloud storage platform where you can upload your photos (and videos) for safekeeping. Think of it as a mystical cloud kingdom where your photos can live happily ever after.
The Photobucket Charm:
- Generous Storage at an affordable price: Photobucket gives you one terabyte of photo storage for only $5 per month with the My Bucket Plan, which is enough space for 500,000 photos (based on 2MB image size).
- Reliable Auto Backup feature: Turn on Auto Backup in the mobile app to ensure that your photos are backed up to your account as soon as you take them!
- Easy Peasy Organization: With Photobucket, sorting photos into albums is as simple as pie. 🥧
- Share with a Click: Send links to your galleries to the whole squad with just a tap.
- Privacy Control: Keep your snapshots as private or as public as you want – you're the boss.
- Compression-free Guarantee: Photobucket guarantees that the quality of what you upload and what you download never changes and you don't have to pay extra for this feature!
The Photobucket Process:
- Sign Up: Create your Photobucket account.
- Upload Away: Send your photos to the cloud with ease.
- Organize: Create albums to add that personal touch.
- Edit: Use Photobucket’s tools to give your photos a little extra sparkle. ✨
- Share: Photobucket works like magic across both iOS and Android devices.
- Print: Yes, you can get those shots printed on mugs, canvases, and more!
Embrace the Memories 🤗📸
Your Mac, paired with Photobucket, can be the dynamic duo of photo storage. And if you need video storage they got you covered there too. So, go ahead, give your photos the love and organization they deserve. And remember, every click is not just a photo; it's a ticket to a time-travel adventure. So pack up those pixels and let's make some photo magic happen! 🌈 🖼️
There you have it – your guide to making your Mac the coolest photo album on the block, with a little help from Photobucket. Now go on and make those memories shine! 🌟👩💻✨