Are you tired of worrying about losing your priceless videos? Well, worry no more! In this step-by-step guide, we'll show you how to back up your videos from your iPhone to iCloud, Apple's cloud storage service. And guess what? We'll also introduce you to Photobucket, an awesome online cloud storage alternative to iCloud for backing up your videos (and you'll also get more storage for less)! So, let's talk about iOS backup videos.
Step 1: Ensure iCloud Backup is Enabled
First things first, let's make sure iCloud backup is
enabled on your iPhone. Here's how you do it:
- Open your iPhone's Settings.
- Tap on your Apple ID at the top of the screen.
- Select "iCloud" from the list.
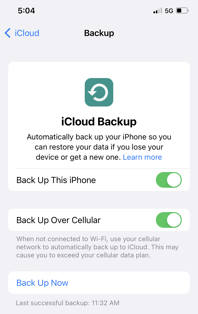
- Scroll down and tap on "iCloud Backup."
- Toggle the "iCloud Backup" switch to turn it on if it's not already enabled.
Step 2: Connect to Wi-Fi and Plug in Your iPhone
To avoid excessive data charges and ensure a smooth backup process, connect your iPhone to a Wi-Fi network. Also, plug your iPhone into a power source to prevent it from running out of battery during the backup.

Step 3: Initiate the Backup Process
Now that you're all set up, let's start the backup process:
- Go back to the "iCloud Backup" screen (Settings > [Your Name] > iCloud > iCloud Backup).
- Tap on "Back Up Now."
- Wait for the backup process to complete. The duration will depend on the size of your video library and the speed of your internet connection.
Step 4: Verify the Backup
After the backup is finished, it's a good idea to double-check if your videos are safely stored in iCloud:
- Return to the main iCloud settings screen (Settings > [Your Name] > iCloud).
- Tap on "Manage Storage."
- Select "Backups."
- Look for your device's name in the list and tap on it.
- You should see a list of backed-up data, including your videos. Confirm that the videos you want to back up are present.
Now that you know how to back up videos to iCloud, let's explore an excellent and more cost-efficient video storage alternative—Photobucket.
iCloud's Achilles' Heel
First, let's address the elephant in the room - iCloud. While Apple's cloud service has its perks, it's not everyone's cup of tea when it comes to backing up videos. Sure, it seamlessly syncs your files across Apple devices, but here's the kicker: it only offers a measly 5GB of free storage. Seriously, Apple? That's barely enough for a few selfies, let alone your treasured videos.
Photobucket to the Rescue
Enter Photobucket, the backup cloud storage hero you've been waiting for. Known primarily as an online photo storage platform, Photobucket also is a safe and secure video backup solution, too. Here's why it's an excellent alternative to iCloud for your iPhone video storage needs:
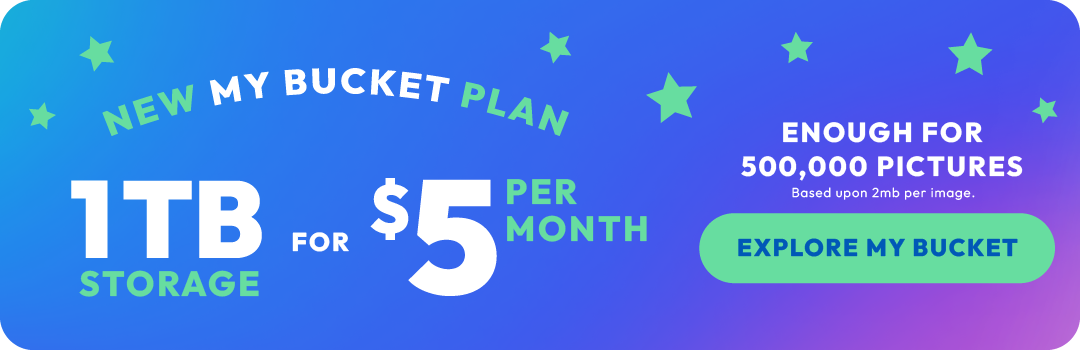
- Generous Storage Options: Unlike iCloud's stingy 5GB, Photobucket's new My Bucket plan offers one terabyte of photo storage and videos storage for only $5 per month! Photobucket also gives you the ability to organize, edit and share your videos and photos . With Photobucket, you get all the storage you need now and in the future. No more sweating bullets over storage limits!
- Seamless Video Uploads: Photobucket's mobile app makes uploading videos from your iPhone a breeze. With a user-friendly interface, you can quickly transfer your videos to the cloud, ensuring they're safe and sound. It's like having a personal butler to handle all your video cloud backup needs.
- Organizational Superpowers: Photobucket provides an array of tools to keep your video library in tip-top shape. You can create albums, add tags, and even edit video titles and descriptions. Say goodbye to that mess of unnamed videos cluttering up your storage. Photobucket keeps everything organized, so you can find that epic slow-mo of your friend's hilarious wipeout with ease.
- Sharing, Collaboration, and More: Photobucket goes above and beyond by allowing you to share your videos on both iOS and Android. Whether it's sharing on social media or collaborating with friends and family on projects, Photobucket has your back.
Backup Best Practices
Now that we've introduced our trusty online cloud backup hero, Photobucket, it's time to establish some best practices to ensure your videos remain safe:
1. Regular Backups
Make it a habit to back up your videos regularly. Photobucket’s Auto Backup feature in the mobile app makes this a no-brainer. Set it and forget it—and your videos will be backed up to the cloud automatically.
2. Wi-Fi and Power
Always perform backups when connected to Wi-Fi, especially for large video files. This way, you won't gobble up your precious mobile data or end up with incomplete backups. Additionally, ensure your device is adequately charged or plugged in during the process. No one wants a backup cut short by a power outage.
3. Verify Backups
Once your videos are backed up, take a moment to verify that everything is securely stored in the cloud. Double-check your Photobucket library to ensure your videos are present and accounted for. It's better to be safe than sorry!
Congratulations, my video-backup friends! You are now armed with the knowledge and tools to become the ultimate iPhone video storage superheroes. Remember, while iCloud may have its limitations, the mighty Photobucket swoops in to save the day with its generous and affordable online storage and backup options, seamless uploads, organizational prowess, and sharing capabilities.
Now get out there, record those unforgettable moments, and rest easy knowing your videos are backed up with Photobucket by your side.
Happy snapping!